
Creating a project sets up a new delivery pipeline: name it, choose how it ships changes, connect its source control, then set the review policy and starting team. From there the team can begin creating Work Items.
Create a project in Serpent
Open the new-project flow with the "Try it in Serpent" button above, then work through each step:
-
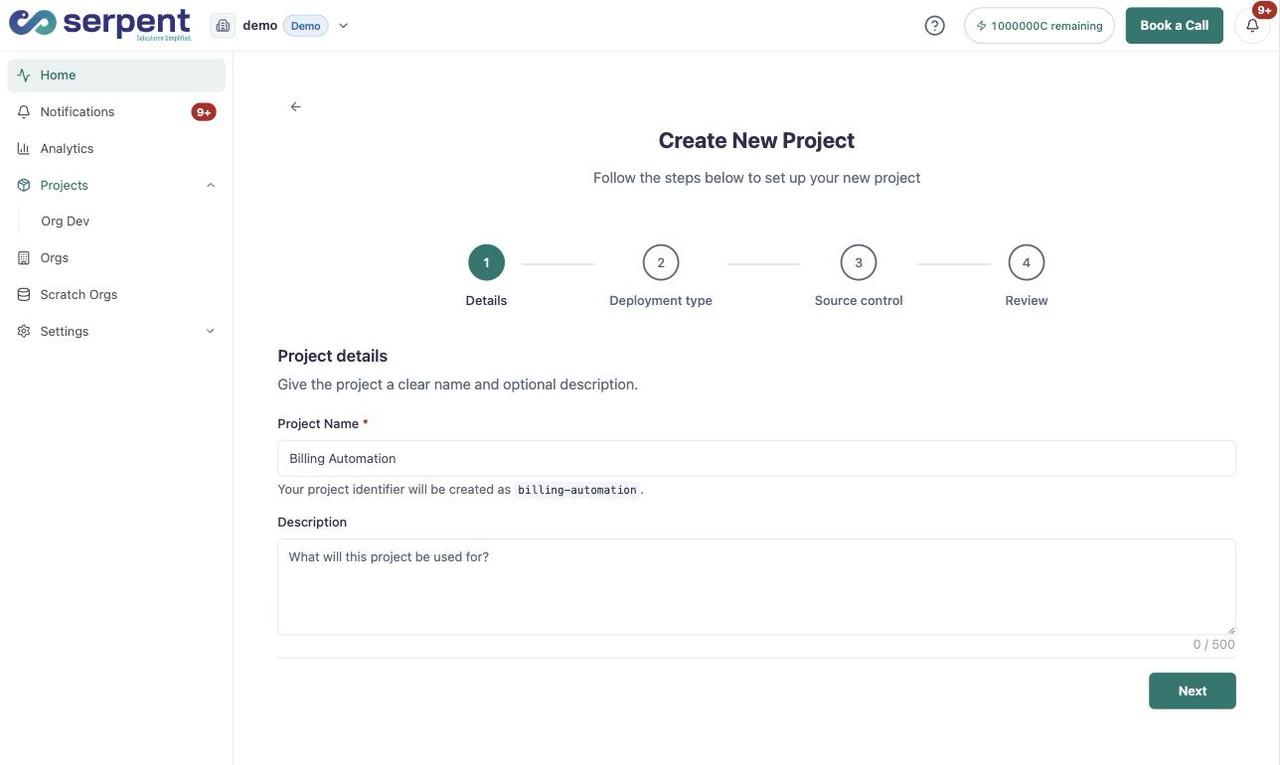
Name the project
Type a clear project name and an optional description, then continue. Serpent turns the name into a project identifier automatically, so there is no slug to set.
-
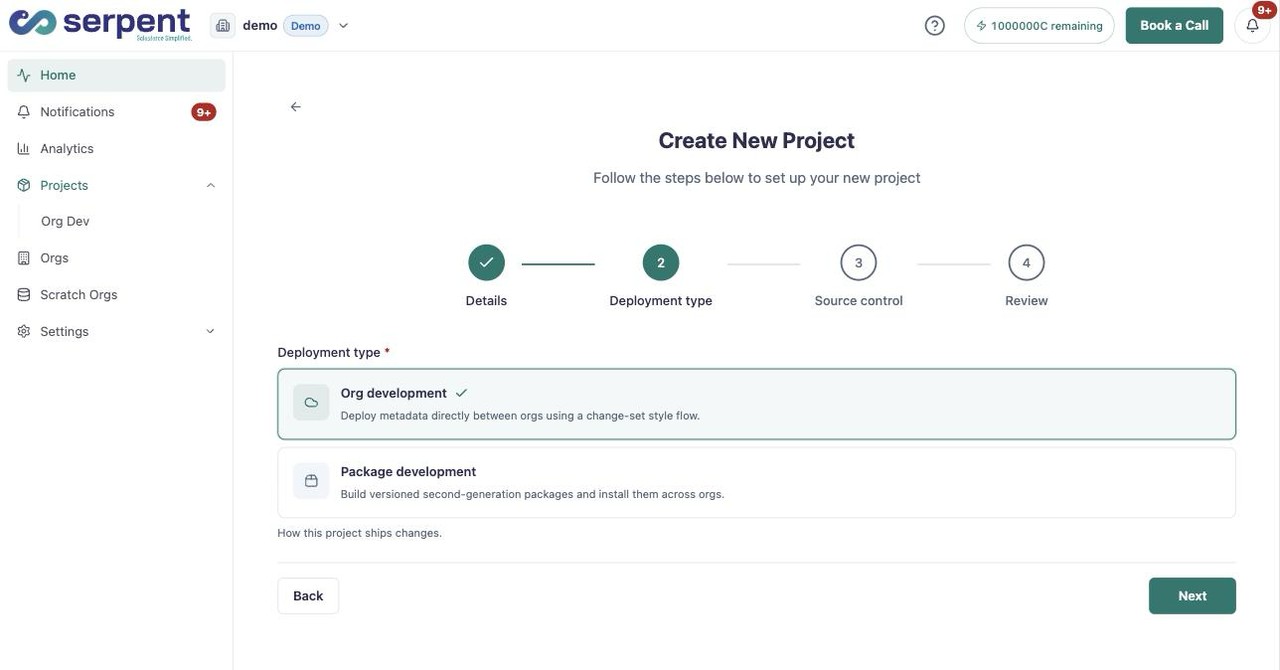
Choose a deployment type
Choose Org development to deploy metadata directly between orgs in a change-set style flow, or Package development to build versioned second-generation packages you install across orgs.
-
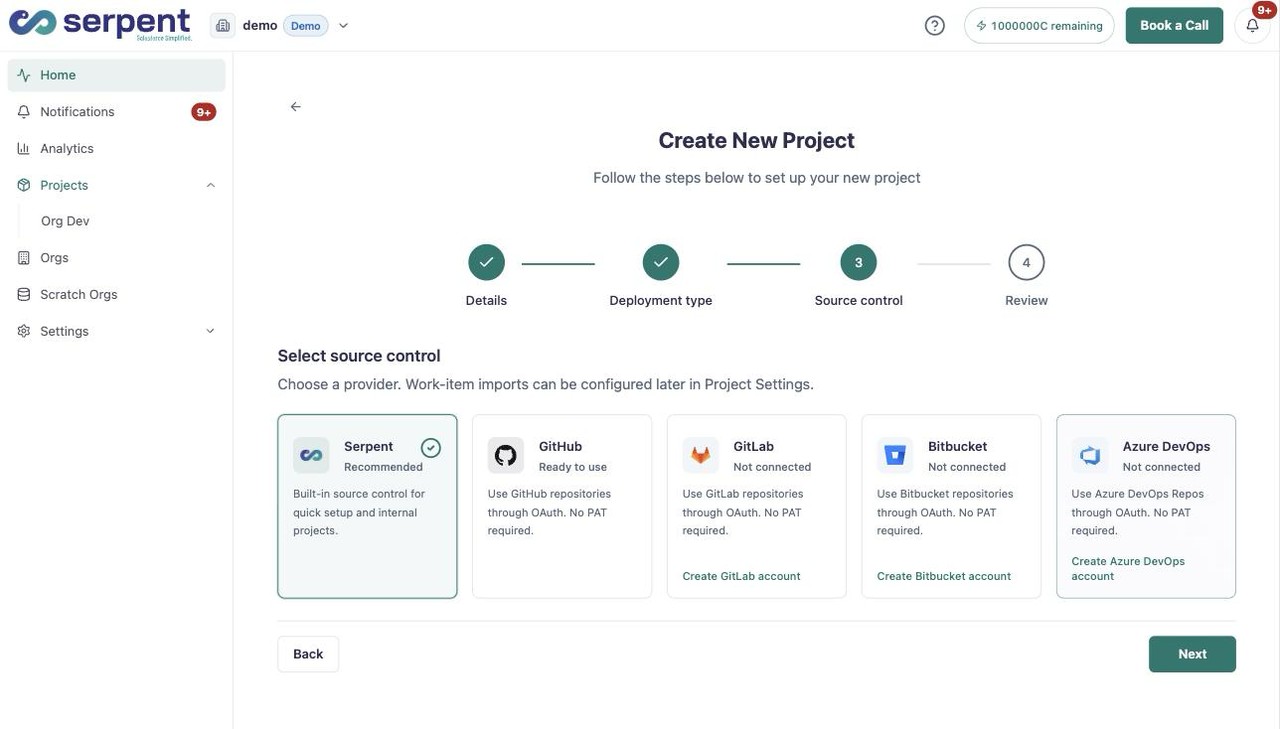
Select source control
Pick where the repository lives. Choose Serpent for built-in source control with no account, or connect GitHub, GitLab, Bitbucket, or Azure DevOps through OAuth. No access token needed. This connection is required for later Work Items to get a branch automatically, so do not skip it.
-
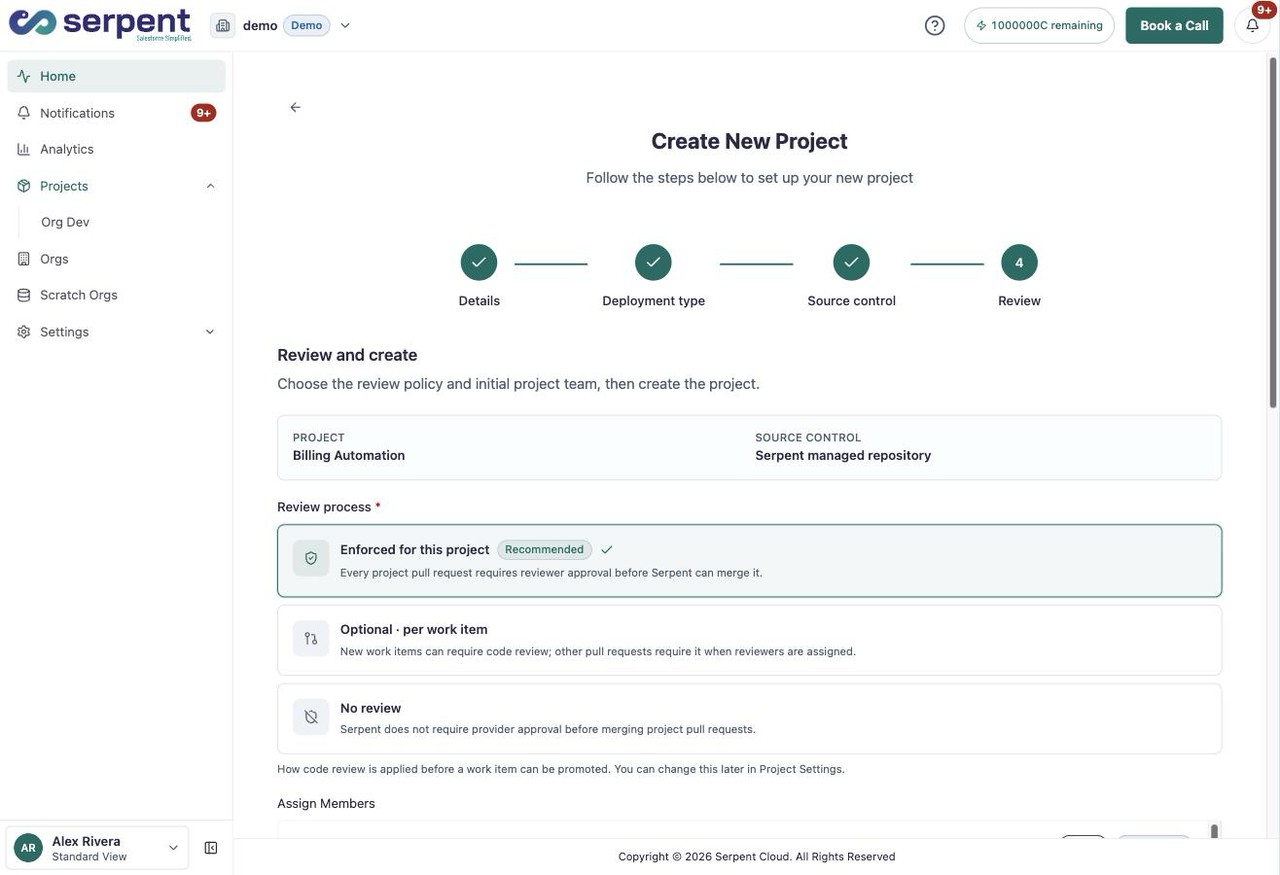
Set the review policy and create
Review the summary, choose how code review is enforced, assign the starting team, then select Create project to finish. You can change the review policy and members later in Project Settings.
Connect orgs
Once the project exists, open the Orgs area and add the Salesforce orgs it develops against and releases to. You can connect more orgs later as the project grows.